
In the ever-evolving landscape of operating systems, users often navigate between versions to align with their preferences and requirements. While the allure of Windows 11’s fresh features may have beckoned many, there are instances where reverting to the familiarity of Windows 10 becomes necessary.
This guide serves as a beacon for those seeking to embark on this journey, providing a seamless pathway back to the comfort of Windows 10. With a meticulously crafted roadmap and strategic maneuvers, downgrade from Windows 11 to Windows 10 will be a breeze, ensuring a smooth return to the operating system of choice.
Here is a complete guide on how to restore Windows 11 to Windows 10
Backup Your Data
Safeguarding your critical files and data is paramount before embarking on any significant alterations to your operating system. Take proactive measures to create duplicates or store your essential information in secure locations, mitigating the risk of potential loss. This preparatory step serves as a safety net, ensuring that cherished memories, vital documents, and irreplaceable data remain intact throughout the transition process.

By prioritizing preserving your digital assets, you proactively shield yourself against unforeseen circumstances, fostering peace of mind as you navigate the intricacies of operating system modifications. Take heed and fortify your data fortress before venturing forth.
Check Compatibility
Before initiating the downgrade process, it’s imperative to conduct a thorough assessment of your device’s compatibility with Windows 10. Verify that your hardware specifications align with the system requirements outlined by Microsoft to avert potential compatibility issues preemptively.
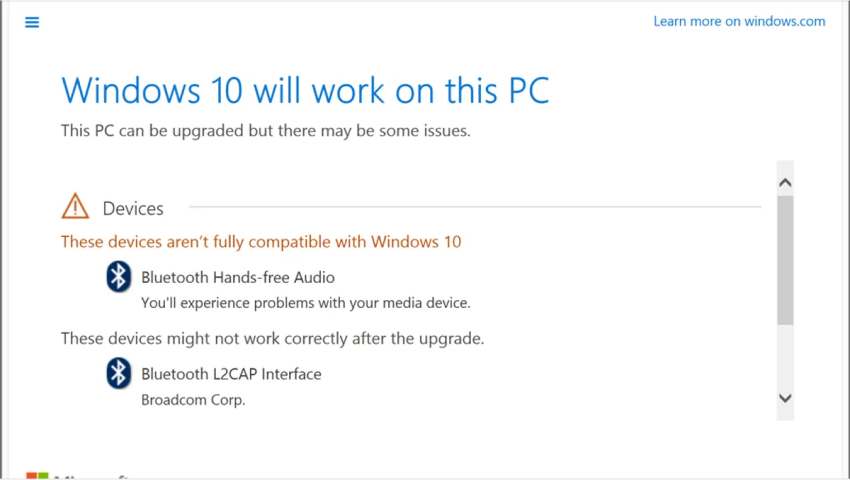
By scrutinizing crucial components such as processor, memory, and storage capacity, you ensure a seamless transition to Windows 10 without encountering unforeseen obstacles. This proactive approach empowers you to preemptively address discrepancies, minimizing disruptions and streamlining the downgrade process. Prioritize compatibility checks as a foundational step towards a successful transition, safeguarding against complications and facilitating a smooth migration back to Windows 10.
Download Windows 10 Installation Media
Acquiring the Windows 10 installation media is the next crucial step in the downgrade process. Secure a copy from the official Microsoft website or craft a bootable USB drive using the Windows 10 ISO file. This pivotal resource is your gateway to reinstalling Windows 10 on your device, facilitating a seamless transition from Windows 11.
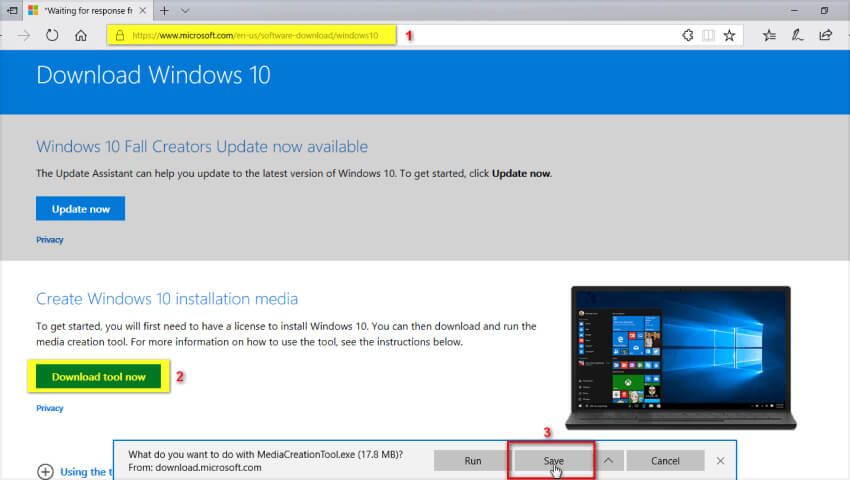
Whether opting for the convenience of direct download or the flexibility of a bootable USB drive, ensure you have access to the requisite installation files. With this essential component, you can return to Windows 10 with confidence and efficacy.
Create a Backup of Windows 11
Before proceeding with the downgrade, prudently safeguard your existing Windows 11 setup by generating a backup image. Employ built-in utilities such as System Restore or opt for reputable third-party software to create a comprehensive snapshot of your system.
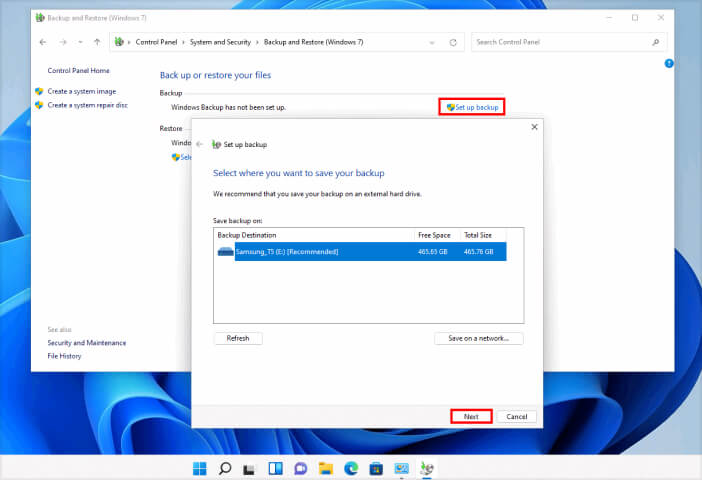
This precautionary measure ensures a safety net, allowing you to revert to Windows 11 should the need arise. By preserving your current configuration through a backup image, you preemptively mitigate the risk of data loss or system instability during the downgrade process. Prioritize this preparatory step to navigate the transition with confidence and resilience.
Access BIOS/UEFI Settings
To initiate the downgrade process, begin rebooting your computer and gaining access to the BIOS or UEFI settings. Upon startup, be prepared to press designated keys tailored to your device, such as F2, Del, or Esc, to enter the BIOS/UEFI menu.
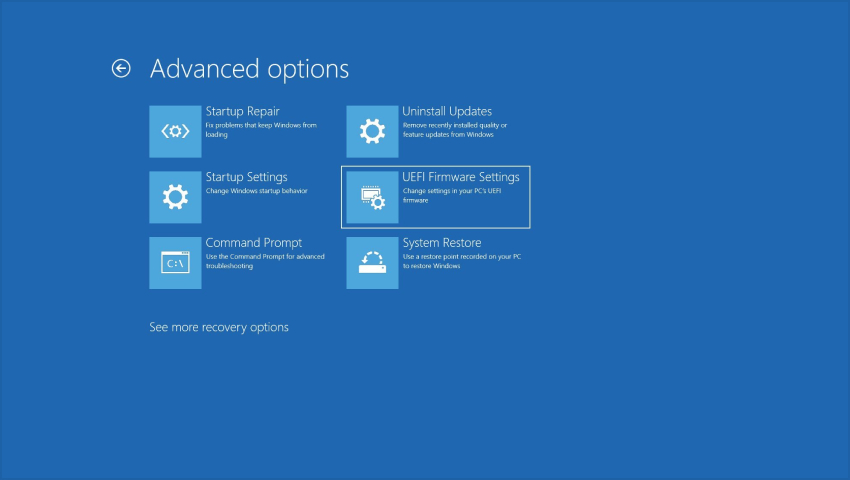
This critical step enables you to configure fundamental system parameters, including boot priority and device settings, essential for executing the transition to Windows 10. Navigating to the BIOS/UEFI interface with precision and timeliness lays the groundwork for a smooth and efficient downgrade procedure. Exercise diligence in this preliminary stage to set the stage for a successful transition.
Change Boot Priority
Within the BIOS/UEFI settings, locate the boot priority or boot order section to orchestrate the next crucial step in the downgrade process. Deliberately adjust the boot priority settings to prioritize booting from the Windows 10 installation media, whether a USB drive or DVD.
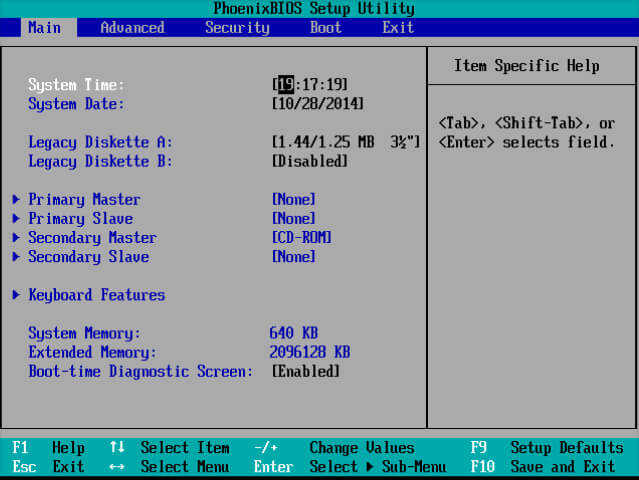
By configuring this preference, you ensure that your system initiates the installation process from the designated source, expediting the transition to Windows 10. Exercise precision and vigilance as you navigate the BIOS/UEFI interface, affirming that the desired boot priority is accurately set. This meticulous adjustment sets the stage for a seamless transition, optimizing the efficiency of the downgrade procedure.
Install Windows 10
After implementing the adjusted BIOS/UEFI settings:
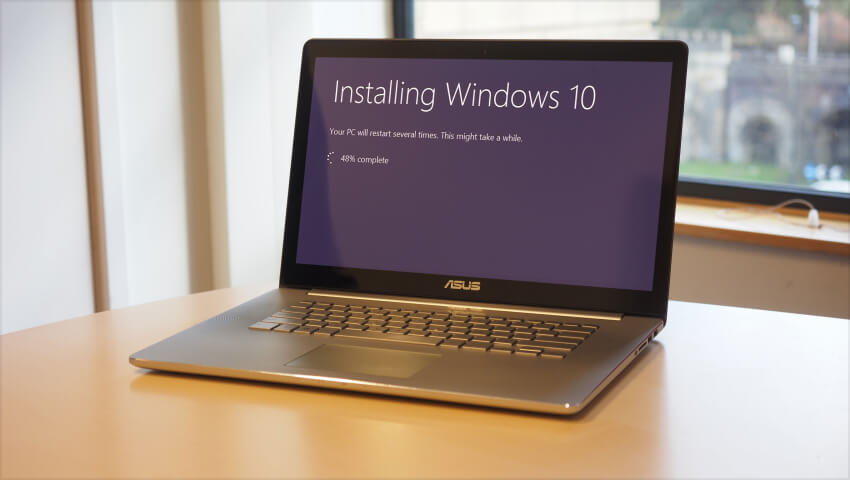
- Save the modifications before restarting your computer to begin the Windows 10 installation process. As the system reboots, it automatically boots from the Windows 10 installation media, whether a USB drive or DVD.
- Navigate through the on-screen prompts and instructions provided by the Windows 10 installation wizard, ensuring careful attention to detail throughout the installation procedure.
- Follow each step diligently, selecting preferences and options as required to tailor the installation to your specifications.
By adhering to the on-screen guidance, you pave the way for a successful installation of Windows 10 on your device, marking significant progress in the downgrade process.
Complete Installation
Upon the installation process’s conclusion, proceed with the initial setup of Windows 10 to finalize the transition. Navigate through the configuration wizard, meticulously adjusting settings to align with your preferences and requirements. This includes defining system preferences, such as language and region settings, creating user accounts, and establishing login credentials.
Customizing your Windows 10 experience according to your needs ensures a seamless integration into your computing environment. By attentively navigating through the initial setup process, you solidify the transition to Windows 10, creating a productive and personalized user experience.
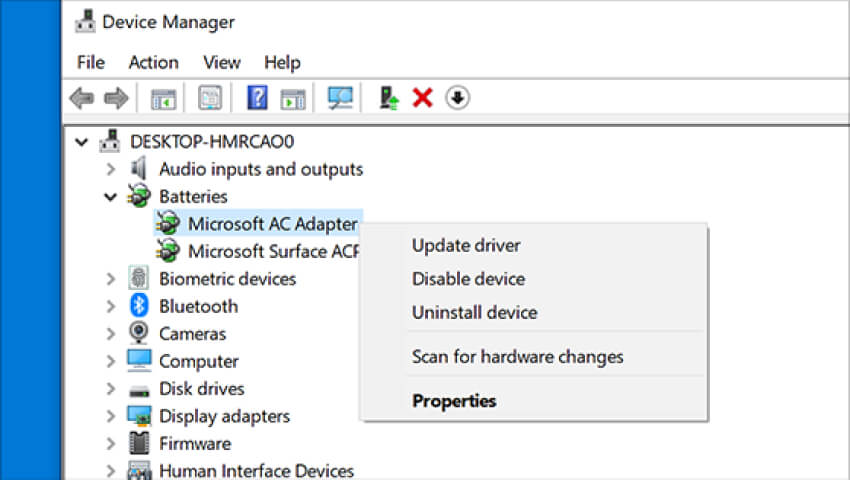
Install Drivers and Updates
Following installing Windows 10, prioritize installing essential drivers tailored to your hardware components. This includes drivers for crucial elements such as the graphics card, network adapter, and other peripherals. By ensuring that all necessary drivers are installed, you optimize the functionality and performance of your system.
Additionally, Windows updates should be promptly conducted to fortify system stability and security, safeguarding against vulnerabilities and enhancing overall performance. Remain vigilant in maintaining an updated system, as regular updates are vital for addressing bugs, improving compatibility, fortifying defenses against emerging threats, and fostering a robust and secure computing environment.
Restore Data
Retrieve your safeguarded files and data from your backup, seamlessly transitioning them from Windows 11 to Windows 10. Utilize external storage devices or leverage cloud storage services to facilitate transfer. Connect external drives or access cloud accounts, navigate to your stored data, and selectively transfer files to your Windows 10 environment.
Exercise caution to ensure the integrity and completeness of your transferred data, verifying each transfer’s success. By methodically transferring your backed-up files, you seamlessly reintegrate your essential data into the Windows 10 environment, ensuring continuity and accessibility across platforms without compromising data integrity.
Optional: Dual Boot Setup
For those seeking versatility, consider configuring a dual-boot setup to accommodate Windows 11 and Windows 10 on your device. This configuration allows you to choose between operating systems during startup, tailoring your computing experience to your needs.
By carefully partitioning your device’s storage space and installing each operating system on separate partitions, you create distinct environments for each OS. Select your preferred operating system from the boot menu upon startup, seamlessly transitioning between Windows 11 and Windows 10 as desired. Embrace the freedom of choice with a dual-boot setup, ensuring optimal platform compatibility and functionality.
Final Checks
Before concluding the transition:
- Conduct thorough assessments to confirm the seamless integration of Windows 10 on your device.
- Test diverse functionalities such as networking, audio, and peripherals to validate their proper operation.
- Address any anomalies promptly, troubleshooting potential issues to uphold system stability.
- Verify software compatibility and performance to guarantee a smooth user experience.
By meticulously scrutinizing every aspect, from hardware functionality to software compatibility, you fortify the reliability of your Windows 10 installation. Embrace proactive troubleshooting to preemptively resolve lingering concerns, ensuring optimal performance and functionality as you finalize the transition process.
In conclusion, transitioning from Windows 11 to Windows 10 is a systematic process that demands careful planning and execution. Users can confidently and efficiently navigate this journey by following the step-by-step guide. Each stage is crucial in ensuring a successful downgrade, from backing up essential data to configuring system settings and conducting thorough checks.
Whether opting for a complete switch to Windows 10 or embracing a dual-boot setup for added flexibility, this guide equips users with the necessary knowledge to make informed decisions. Through diligence and attention to detail, users can seamlessly revert to Windows 10, tailored to their preferences and requirements.

